
The Auto Generate / Payroll Check process will automatically generate check request for every account matching the Account Type selected, for the amount of the available balance through the End Date entered. The most common use of this process is to create Jockey Payroll Checks.
Note: The 'Generate Payroll Checks' button is only active when the check request list (on the left-hand side of the screen), is empty. If any individual check requests appear in the list, the 'Generate Payroll Checks' button will be inactive. To activate the payroll process, either print, or delete the existing check requests.
Account Type: Select from one of the following Account Types: Owner, Trainer, Owner/Trainer, Jockey.
End Date: Enter the date the system should use as the ending date when calculating the amount of the check.
Jockey Guild: If a check for the Jockey Guild should also be included in this check run, put a check mark in the Checkbox.
Generate Payroll Checks: This activates the process which looks at every account matching the Account Type selected and generates a check request for any account with an available balance on the date entered. The system also validates the Auto Generate checks missing Social Security / Federal ID Number or Missing W-9 Tax form. If any account is missing information, the following warning message will be displayed:

The user has the option to view the account(s) with missing information, or to ‘Cancel’ the check request(s). Press <OK>, to display the following screen:
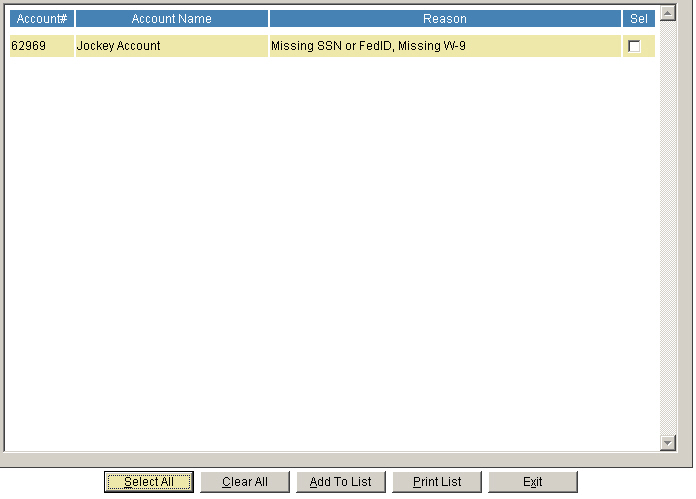
The Account number, Account name and list of missing information will be displayed for each check request. To the right of each line is a checkbox. For each account, the user can decide whether to allow the check to be generated or to discontinue the check request. To continue with the check request, place a checkmark in the checkbox on the right-hand side of the screen. If all accounts on the list are to be included, click the ‘Select All’ button. The system will automatically put a checkmark into every checkbox on the screen. Click the ‘Add To List’ button to include the selected checks to the list of check requests. To remove all checkmarks, click the ‘Clear All’ button. The list can also be printed so the accounts can be researched and updated at a later date.