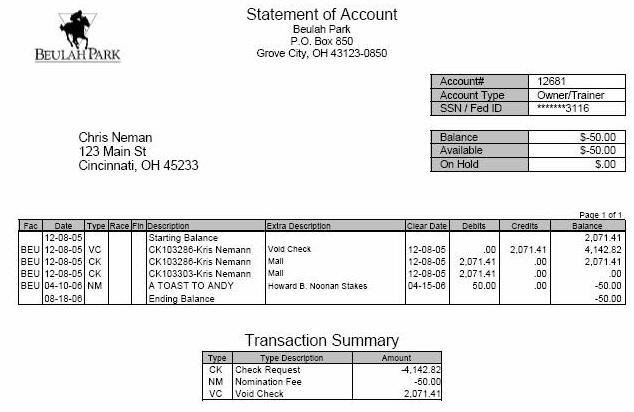
A feature of the Statement generation menu can be used to print Negative Balance Statements. The system will automatically calculate the beginning date the account went negative and display that date and all the transactions up to the current date.
Below are instructions detailing how to generate Negative Balance Statements that display the beginning negative balance date:
From the Main menu choose: Transaction --> Statements
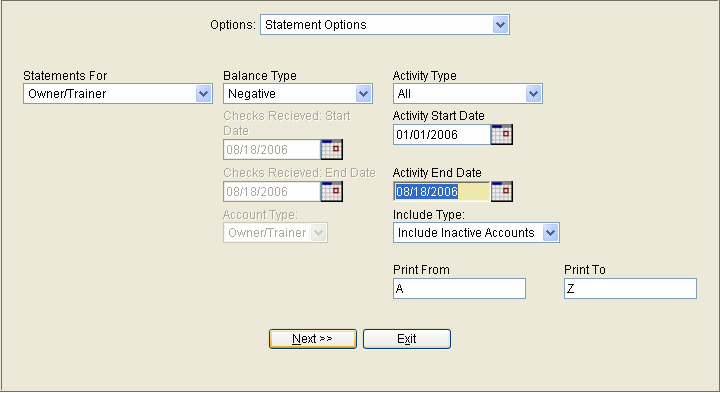
From the ‘Statements For’ dropdown box, chose the type of statements you want to print.
Balance Type must be set to Negative for this feature to work.
Activity Type can be any of the options, but we suggest ‘All’ to produce the most complete details.
Activity Start and End date fields can be ignored, as the system will automatically calculate these dates for each individual account.
Include Type can Include or Exclude Inactive Accounts.
Print From / Print To fields should be set at the default setting of A to Z.
Press the Next button.
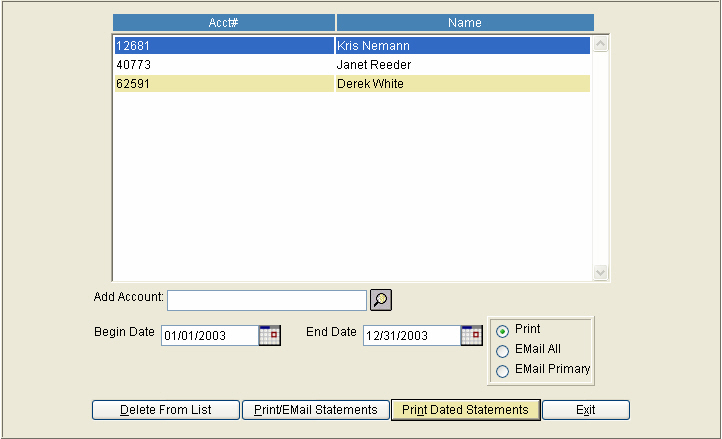
The system will search through all negative accounts as defined on the previous screen, and display all accounts with a negative balance. The Begin and End Date fields on this screen can be ignored as the system bypasses these fields for this operation.
Press the ‘Print Dated Statements’ button.
On the Negative Balance statement example displayed below, December 8, 2005 is the date this account went negative.