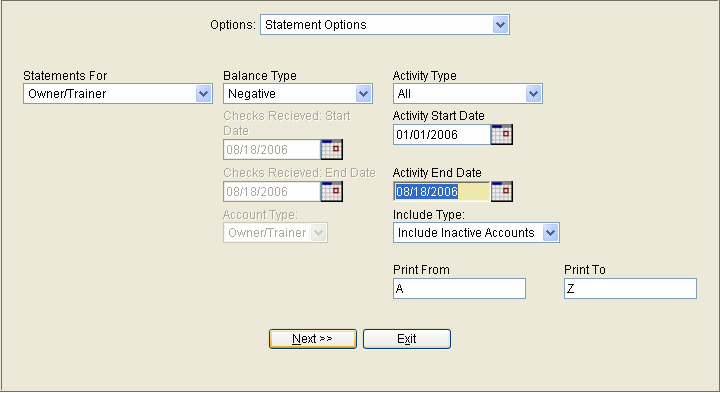
Statements for specific Account types, Balance Types, Activity Type, and Activity Dates can be generated using the Statement Generator screen. The amount of data to be printed at one time can be limited to smaller batches by using the Print From/To option.
Statements For – A selection from the ‘Statements For’ field should be chosen first. Depending on the choice made here, the other fields on the Statement Generator screen will become Active or InActive. The options in the dropdown menu are as follows: All, Selected, ‘Accounts Requesting Checks’ , Owner, Foreign Owner, Jockey, Trainer, Owner/Trainer.
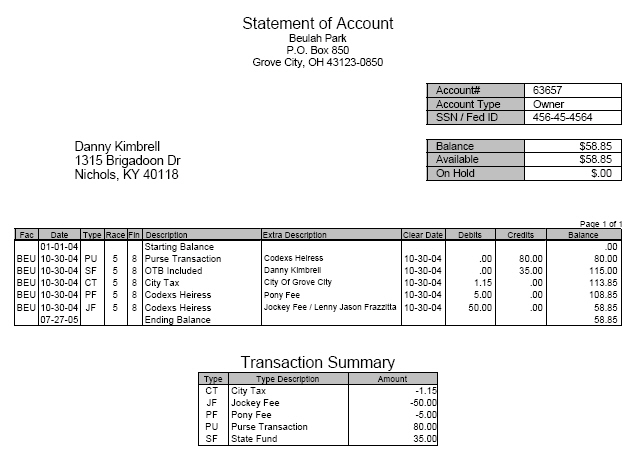
Balance Type – Choose from, Positive, Negative, Zero, Non-Zero or All balance types. Click here for special instructions on how to generate negative balance statements displaying first date of negativity.
Activity Type - Racing, Non-Racing, All, Not Applicable are the choices.
Activity Start and End Dates – Enter the date range of transaction activity here.
Include Type - ‘Include Inactive Accounts’, ‘Exclude Inactive Accounts’, ‘Only Inactive’ are the three choices here. For more information on Inactive Accounts, see Horsemen Maintenance documentation.
Print From / Print To – Some of the statement options can produce large volumes of data. To control the amount of data that is sent to the printer, you can limit the range of Accounts the system will process, by entering beginning and ending Alpha characters in the Print From / Print To boxes. An example would be Print From A and Print To D. In this example all Accounts who’s Sort Names start with the letters, A, B, C and D will be included in the statement list.
Because individual statements vary in the number of pages, we recommend limiting the number of statements to be printed at one time. During printing, if you should experience a problem with your internet connection, or have a paper jam, a smaller range of statements is easier to deal with compared to a larger number.
Click the  button to view the list of statements.
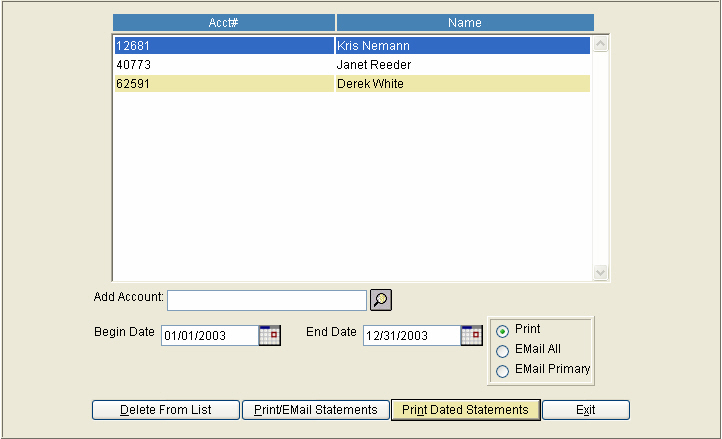
Statements that were generated by the previous selections will appear on this screen. Statements can be Added, Deleted, Printed or Emailed.
Add Account: To manually add another account to the list, enter either the account number of scan for the last name on the account and press enter to select the account from the scanner.
Begin Date / End Date fields: Account activity will only be display between the date range enter.
If Statements were generated for the Account Type of Jockey’ then the Begin and End Dates can be used to limit the Account Activity to a date range that will match the Jockey Payroll checks.
Delete From List: To delete a single statement from the list, highlight the account, and press the Delete from List button.
 Print/Email Statements:
When this button is pressed, statements for the accounts listed above
with either be Printed, sent via Email, depending on the selection indicated.
Print/Email Statements:
When this button is pressed, statements for the accounts listed above
with either be Printed, sent via Email, depending on the selection indicated.
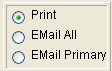
Email All will send the statement to each email address entered in the Email tab of the Horsemen Maintenance screen. Email Primary will only go to the 'Primary' email address.